How to Create An Email Account in cPanel

To create a new email account within cPanel, follow these steps:

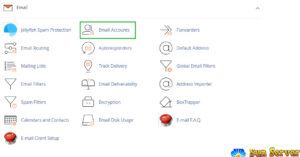
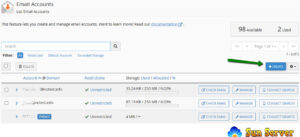
1. Begin by logging into your cPanel. Then, navigate to the “Mail” section and select the “Email Accounts” menu. You can also access the Email Accounts menu conveniently through cPanel Shortcuts within your Sun Server account.
2. Next, click on the “+Create” button.
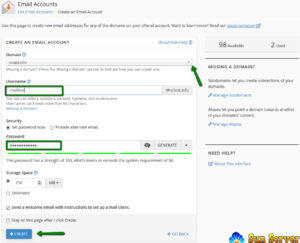
3. If you have multiple domains, choose the domain you wish to associate with your email account from the dropdown list in the top right corner. Then, enter your desired email address. At this stage, you have the option to set the password immediately or provide an alternate email address. If you choose the latter, the system will send an email containing a password configuration link, as well as notifications and password reset emails. Once you’ve configured these settings, click on “+Create.”
 

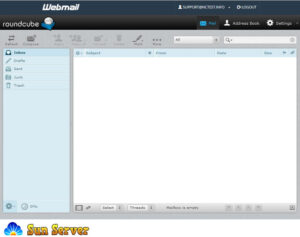
4. To access webmail, click on “Check Email” next to the email account you’ve created.

5. You have the freedom to select your preferred webmail interface. One option is the Roundcube webmail interface. Additionally, you can directly access cPanel webmail in your browser using one of the following links:
– https://yourdomain.com:2096
– https://yourdomain.com/webmail
– http://webmail.yourdomain.com
NOTE: If you use the link http://webmail.yourdomain.com to access cPanel webmail, you may encounter a ‘broken’ interface when accessing the Horde webmail client. This is because the proxy link uses port 80 to connect, while the default cPanel configuration for these clients is set to port 81. This mismatch could result in a connection error or a corrupted webmail display.

That’s the complete process!

How to set up Zoho email for a domain hosted with Sun Server?

If you wish to connect your domain hosted on a Sun Server to your Zoho email, this article is tailored to your needs!

Zoho Mail Suite offers robust Email Hosting features suitable for various types and sizes of organizations. The setup process is straightforward, allowing you to create custom domain-based email addresses for all members of your organization without any downtime.

To configure Zoho Mail:

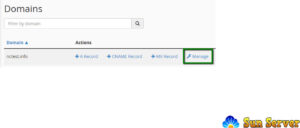
1. Log in to your cPanel account and access the Zone editor menu:

For the cPanel Basic Theme:


For the cPanel Retro Theme:

Once there, click on the Manage button next to the domain for which you want to set up Zoho Mail.

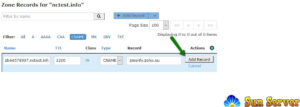
Choose the Add Record >> CNAME type and paste the code generated in the Zoho Control Panel into the Name field. In the Record field, enter the value provided by Zoho, e.g., zmverify.zoho.eu, and then add the record.

For the cPanel Basic Theme:

For the cPanel Retro Theme:

After the domain is verified, you’ll need to create MX Records to link the domain to the mail service.

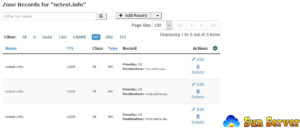
In the same Zone editor menu, click on the Add Record button and select MX records type. Add the following records:

Name Priority Destination
domain.com 10 mx.zoho.eu
domain.com 20 mx2.zoho.eu
domain.com 50 mx3.zoho.eu

NOTE: Depending on the data center location (US/UK/CN), the MX record values may vary for your domain. The correct MX records specific to your domain can be found in the Admin Control Panel.

For the cPanel Basic Theme:

For the cPanel Retro Theme:

These changes typically take about 30 minutes to take effect.

NOTE: The provided MX values are based on general configuration information. For domain-specific configuration, refer to your Admin Control Panel.

You may also need to configure the DKIM and SPF records, which can be set up in your Zoho Control Panel.

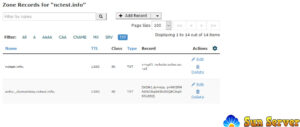
To add these records, choose the TXT record as the record type, enter your domain name in the Name field, and input v=spf1 include:zoho.eu -all in the Record field.

Click on Add Record >> TXT type again, enter zoho._domainkey.domain.eu into the Name field (if ‘zoho’ was specified as the selector in the Zoho Control Panel), and insert the corresponding value of the DKIM record, which you copied from the TXT record value field in your Zoho account, into the Record field.

For the cPanel Basic Theme:

For the cPanel Retro Theme:

These changes will take effect within 30 minutes.

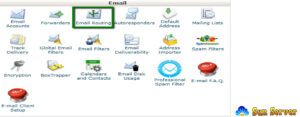
To complete the Zoho Mail setup, you should change the Email Exchanger for the domain in question. Within your cPanel account, go to the Email Routing menu under the Email section:

For the cPanel Basic Theme:

For the cPanel Retro Theme:

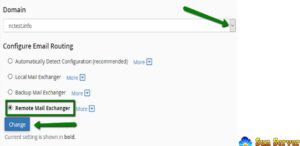
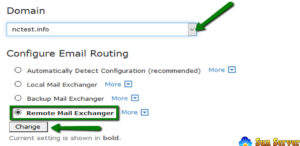
Select your domain from the drop-down menu, choose the Remote Mail Exchanger option, and click the Change button.

For the cPanel Basic Theme:

For the cPanel Retro Theme:

That’s it!